Creating an Agent
Step-by-step guide to creating your first voice AI agent.
Creating an Agent
Step 1: Navigate to A.I Agents
- Click A.I Agents in the sidebar
- Click + Create New Bot
app.kingcaller.ai
1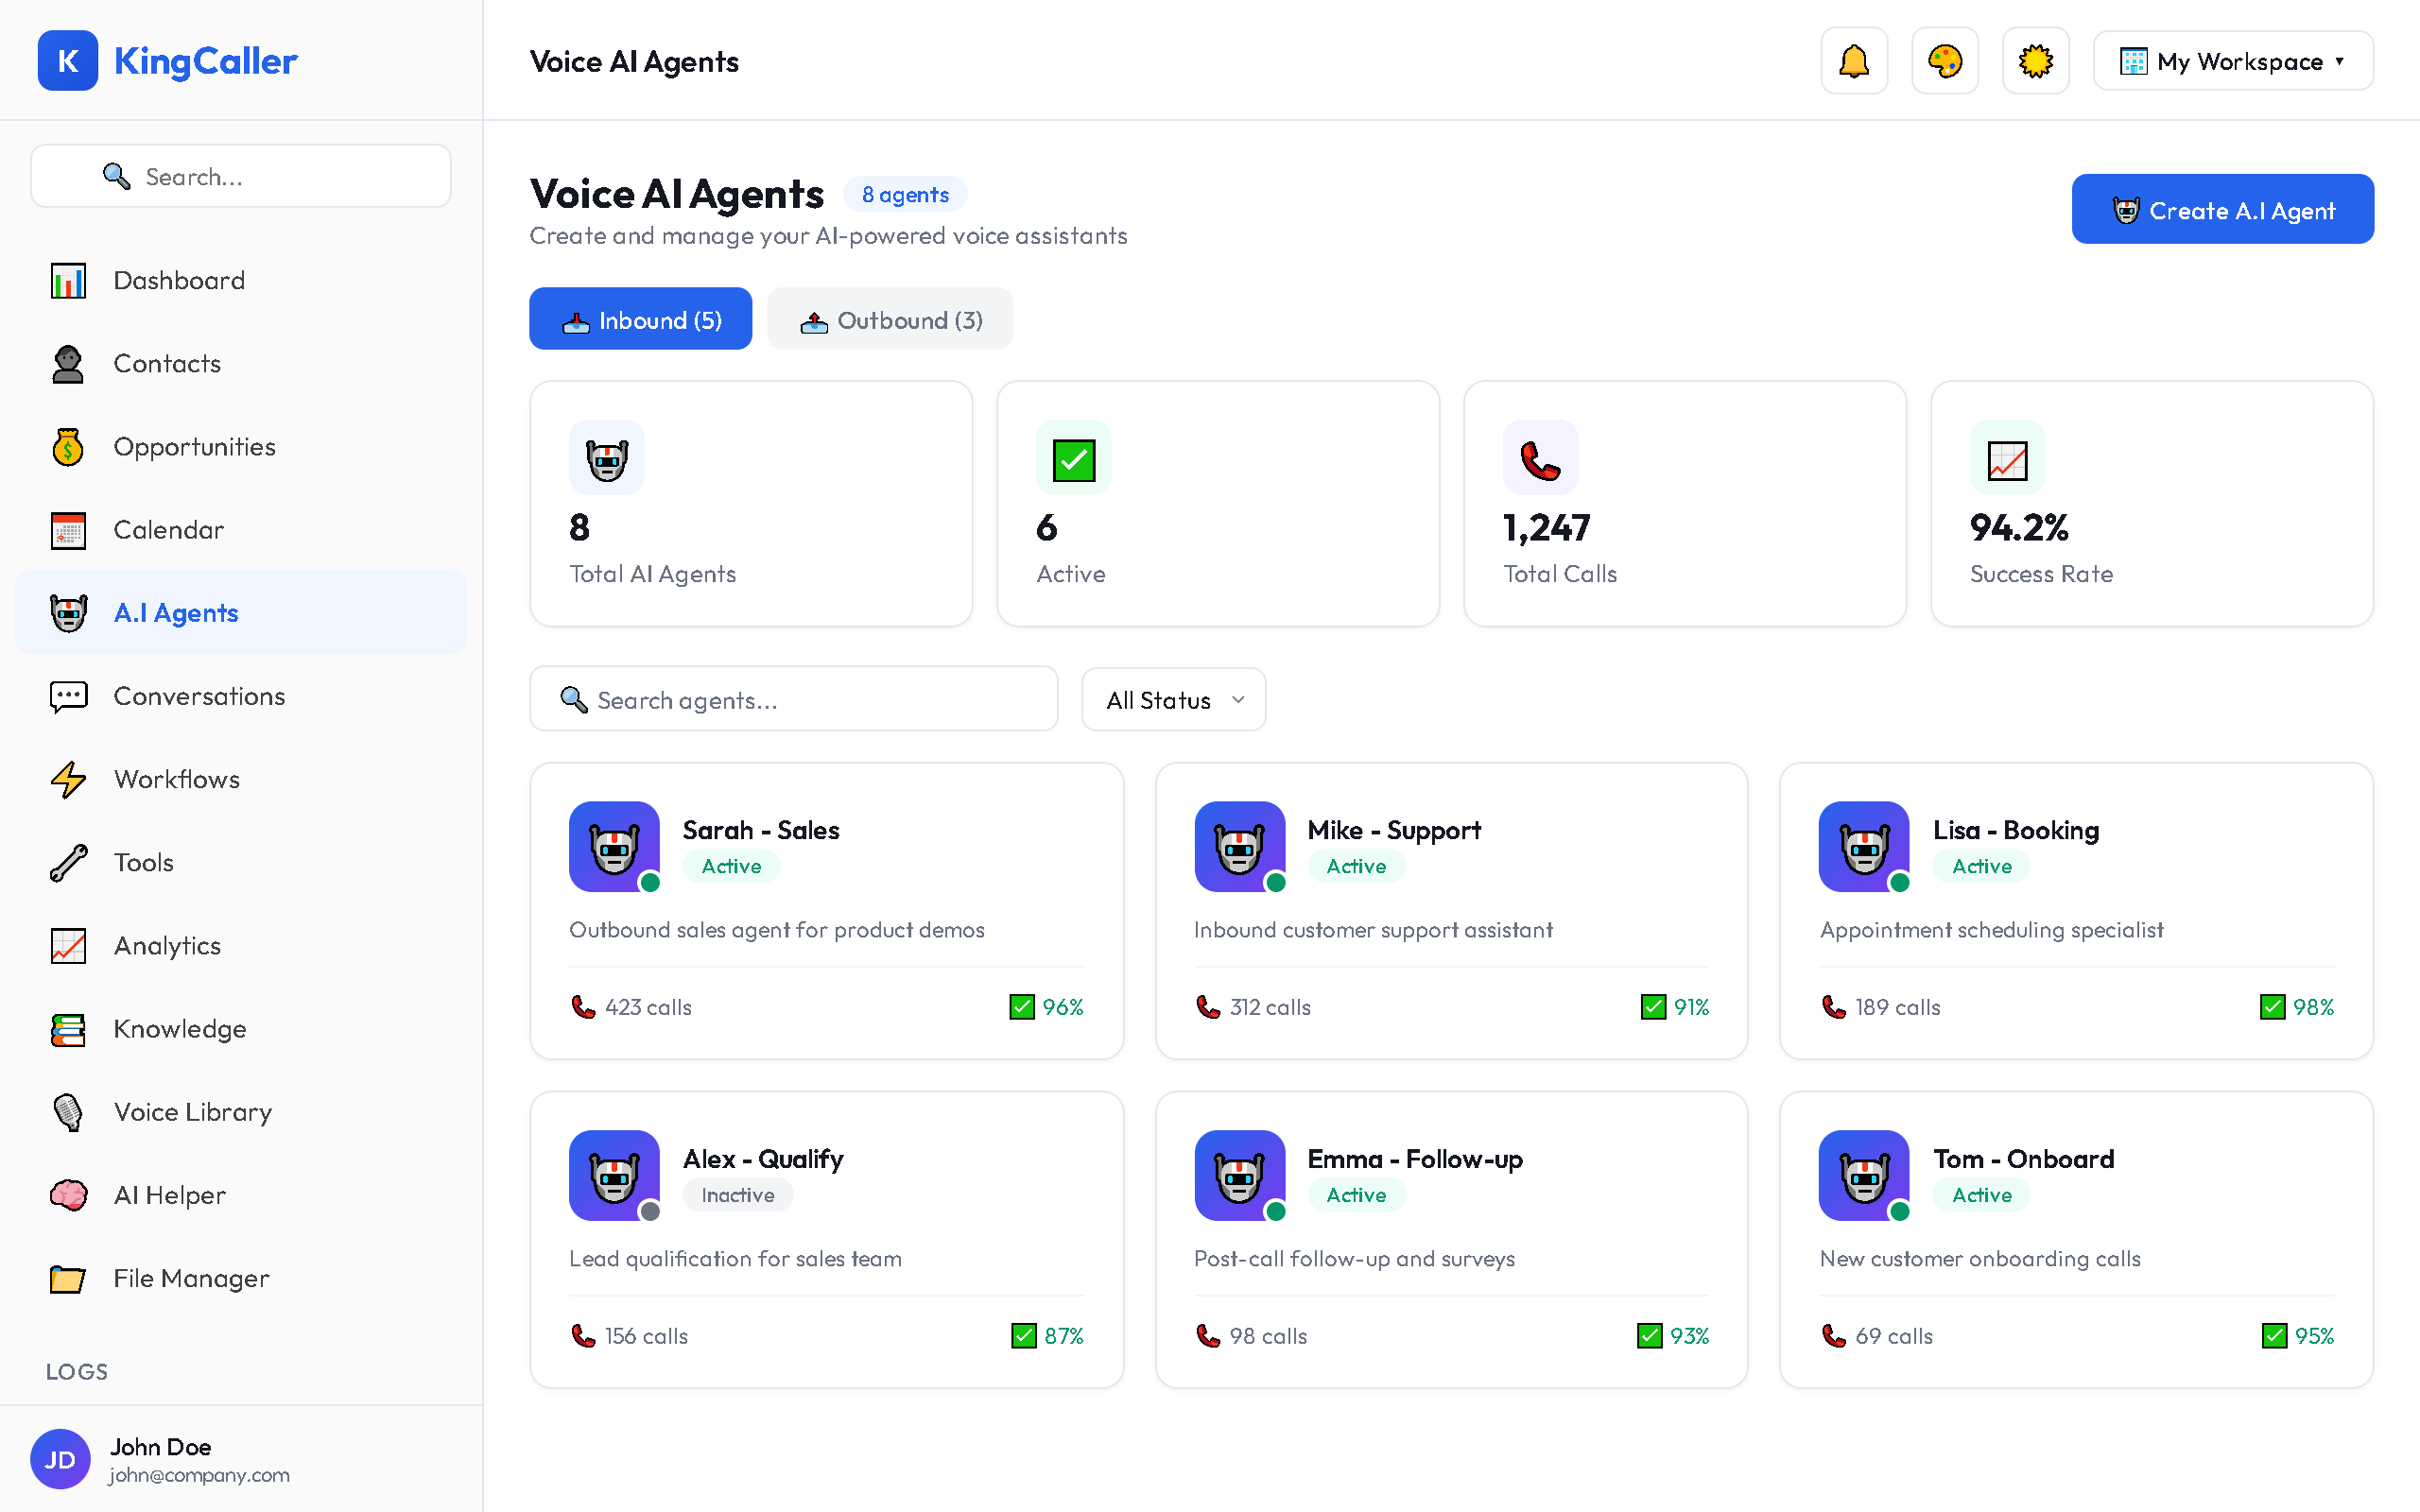
Step 2: Choose Agent Type
A modal appears asking you to select:
app.kingcaller.ai
2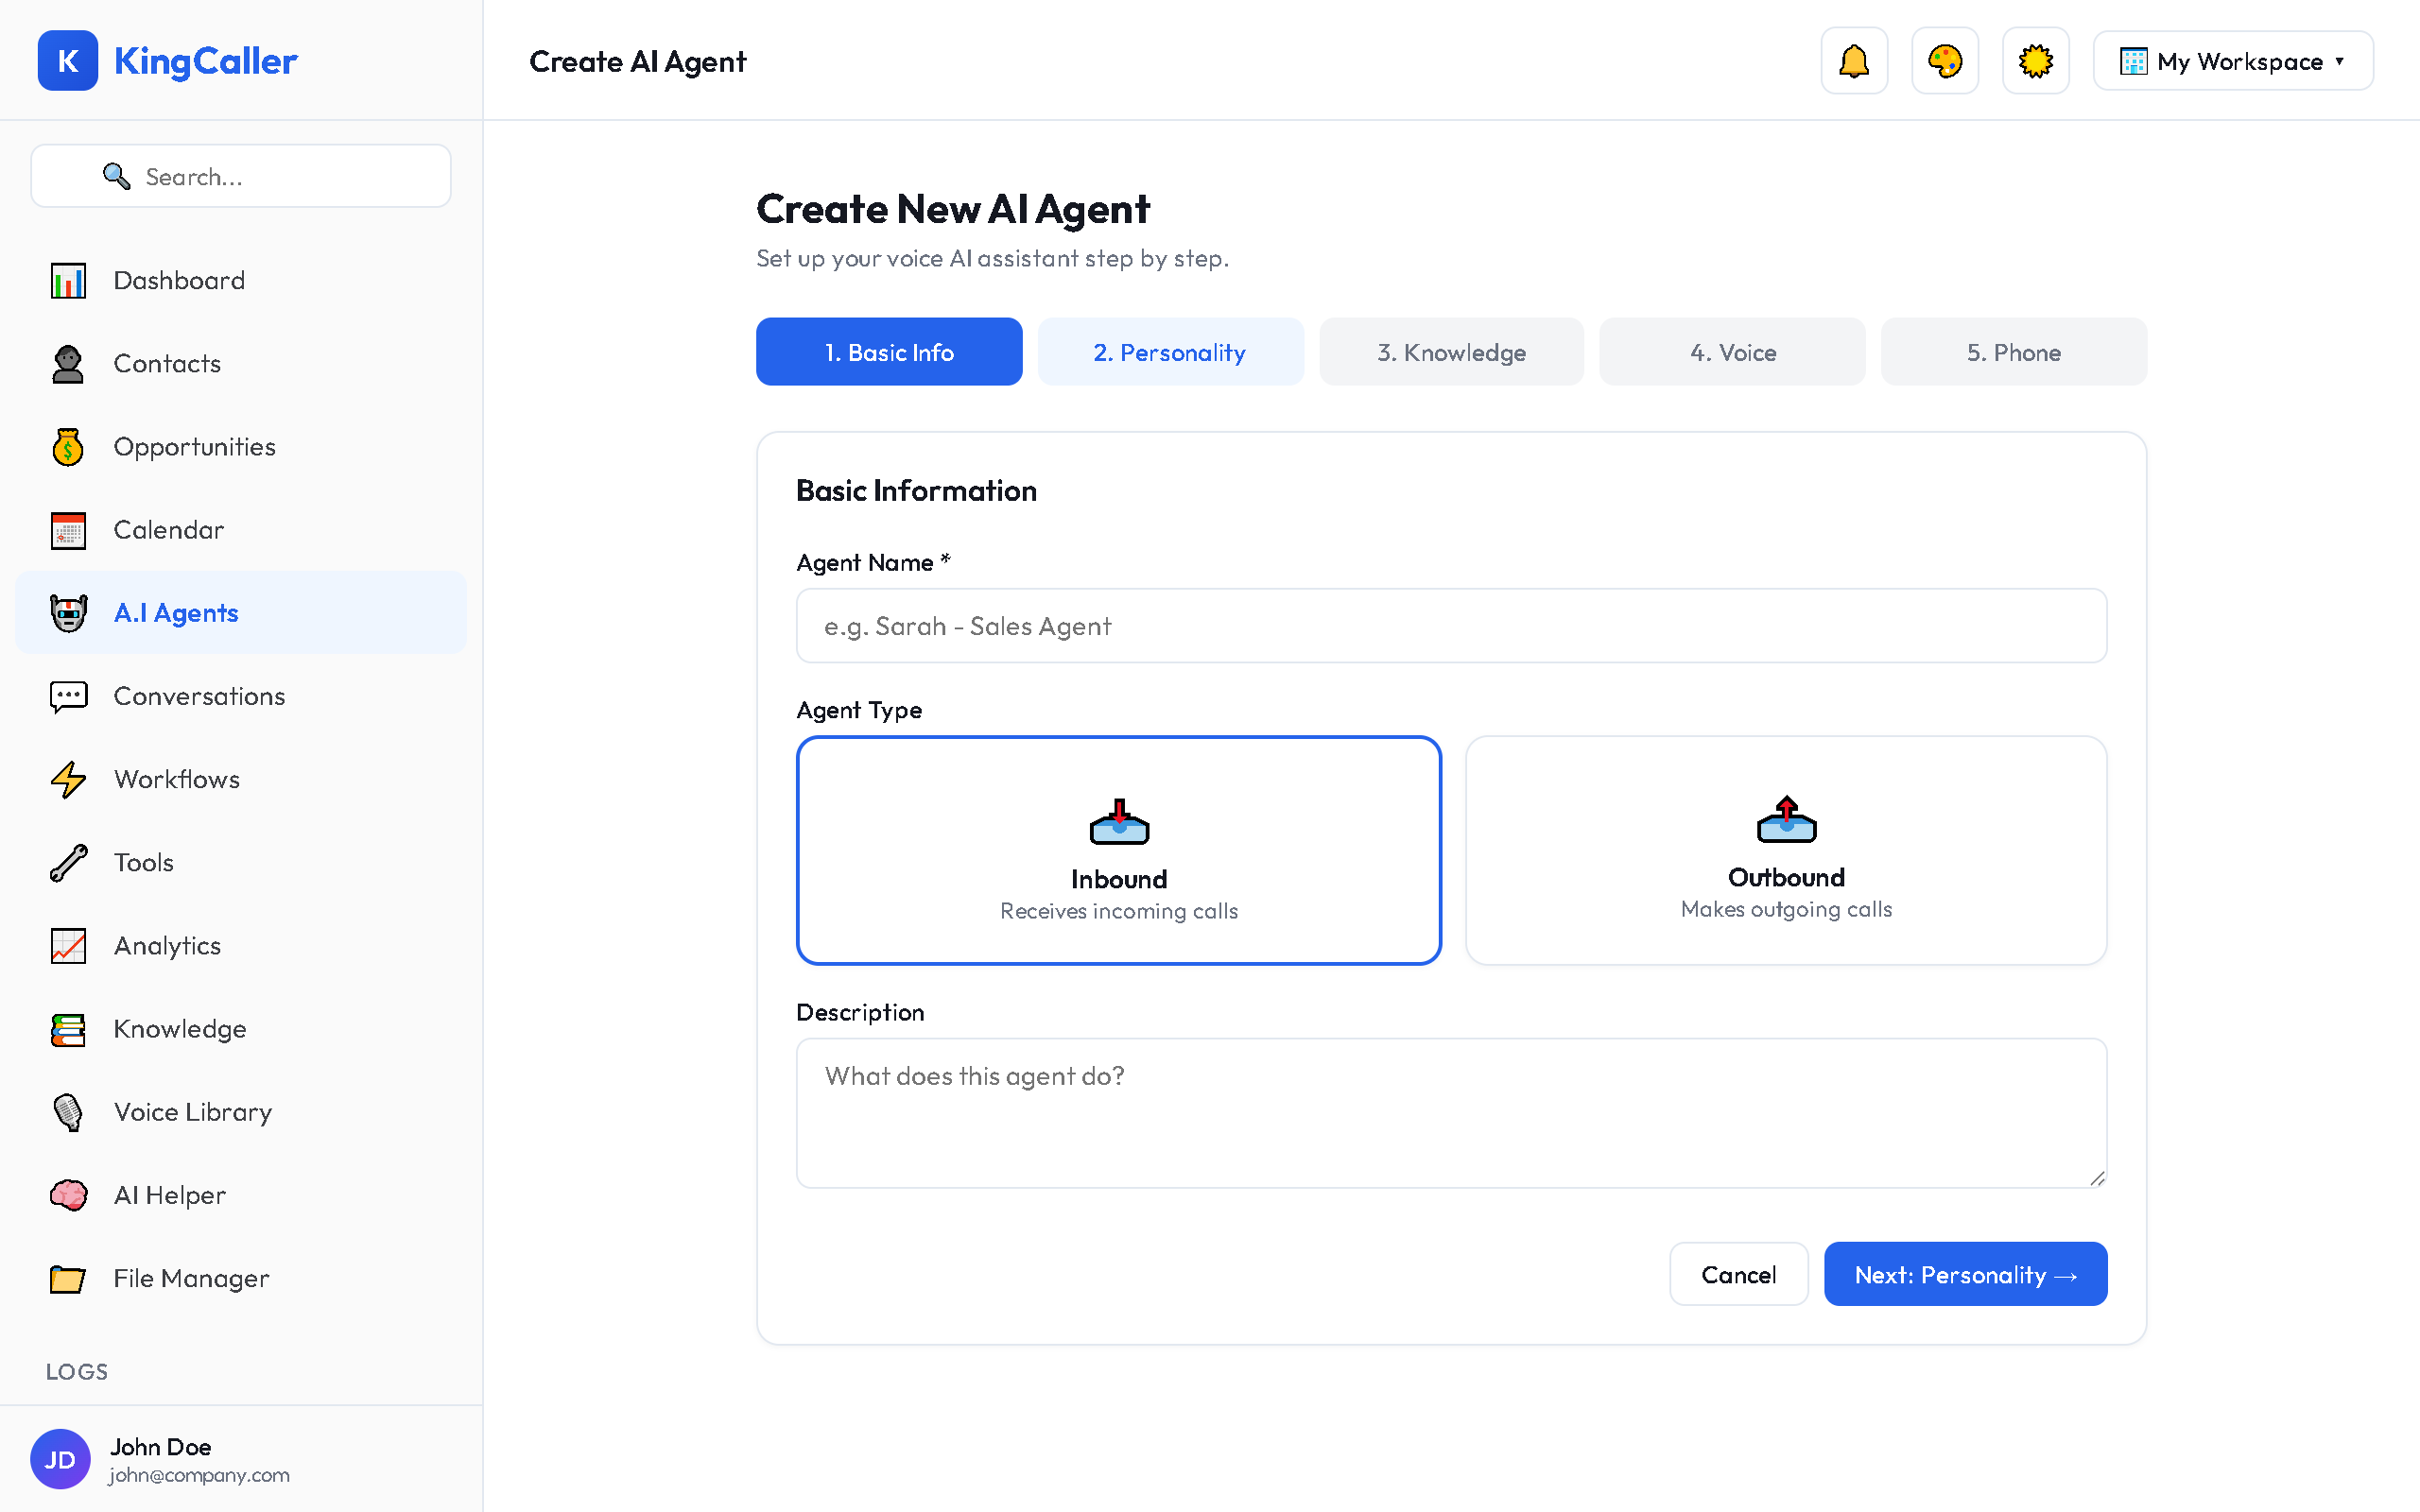
| Type | Use Case |
|---|---|
| Inbound | Answers incoming phone calls (customer support, reception, sales qualification) |
| Outbound | Makes outgoing calls to contacts (lead follow-up, appointment reminders, campaigns) |
Step 3: Basic Information
- Bot Name — descriptive name (e.g., "Sales Assistant", "After-Hours Support")
- Description — brief summary of what this agent does
- Avatar — optional visual icon for the agent
app.kingcaller.ai
3Step 4: System Prompt
Write the instructions that define your agent's personality and behavior:
app.kingcaller.ai
4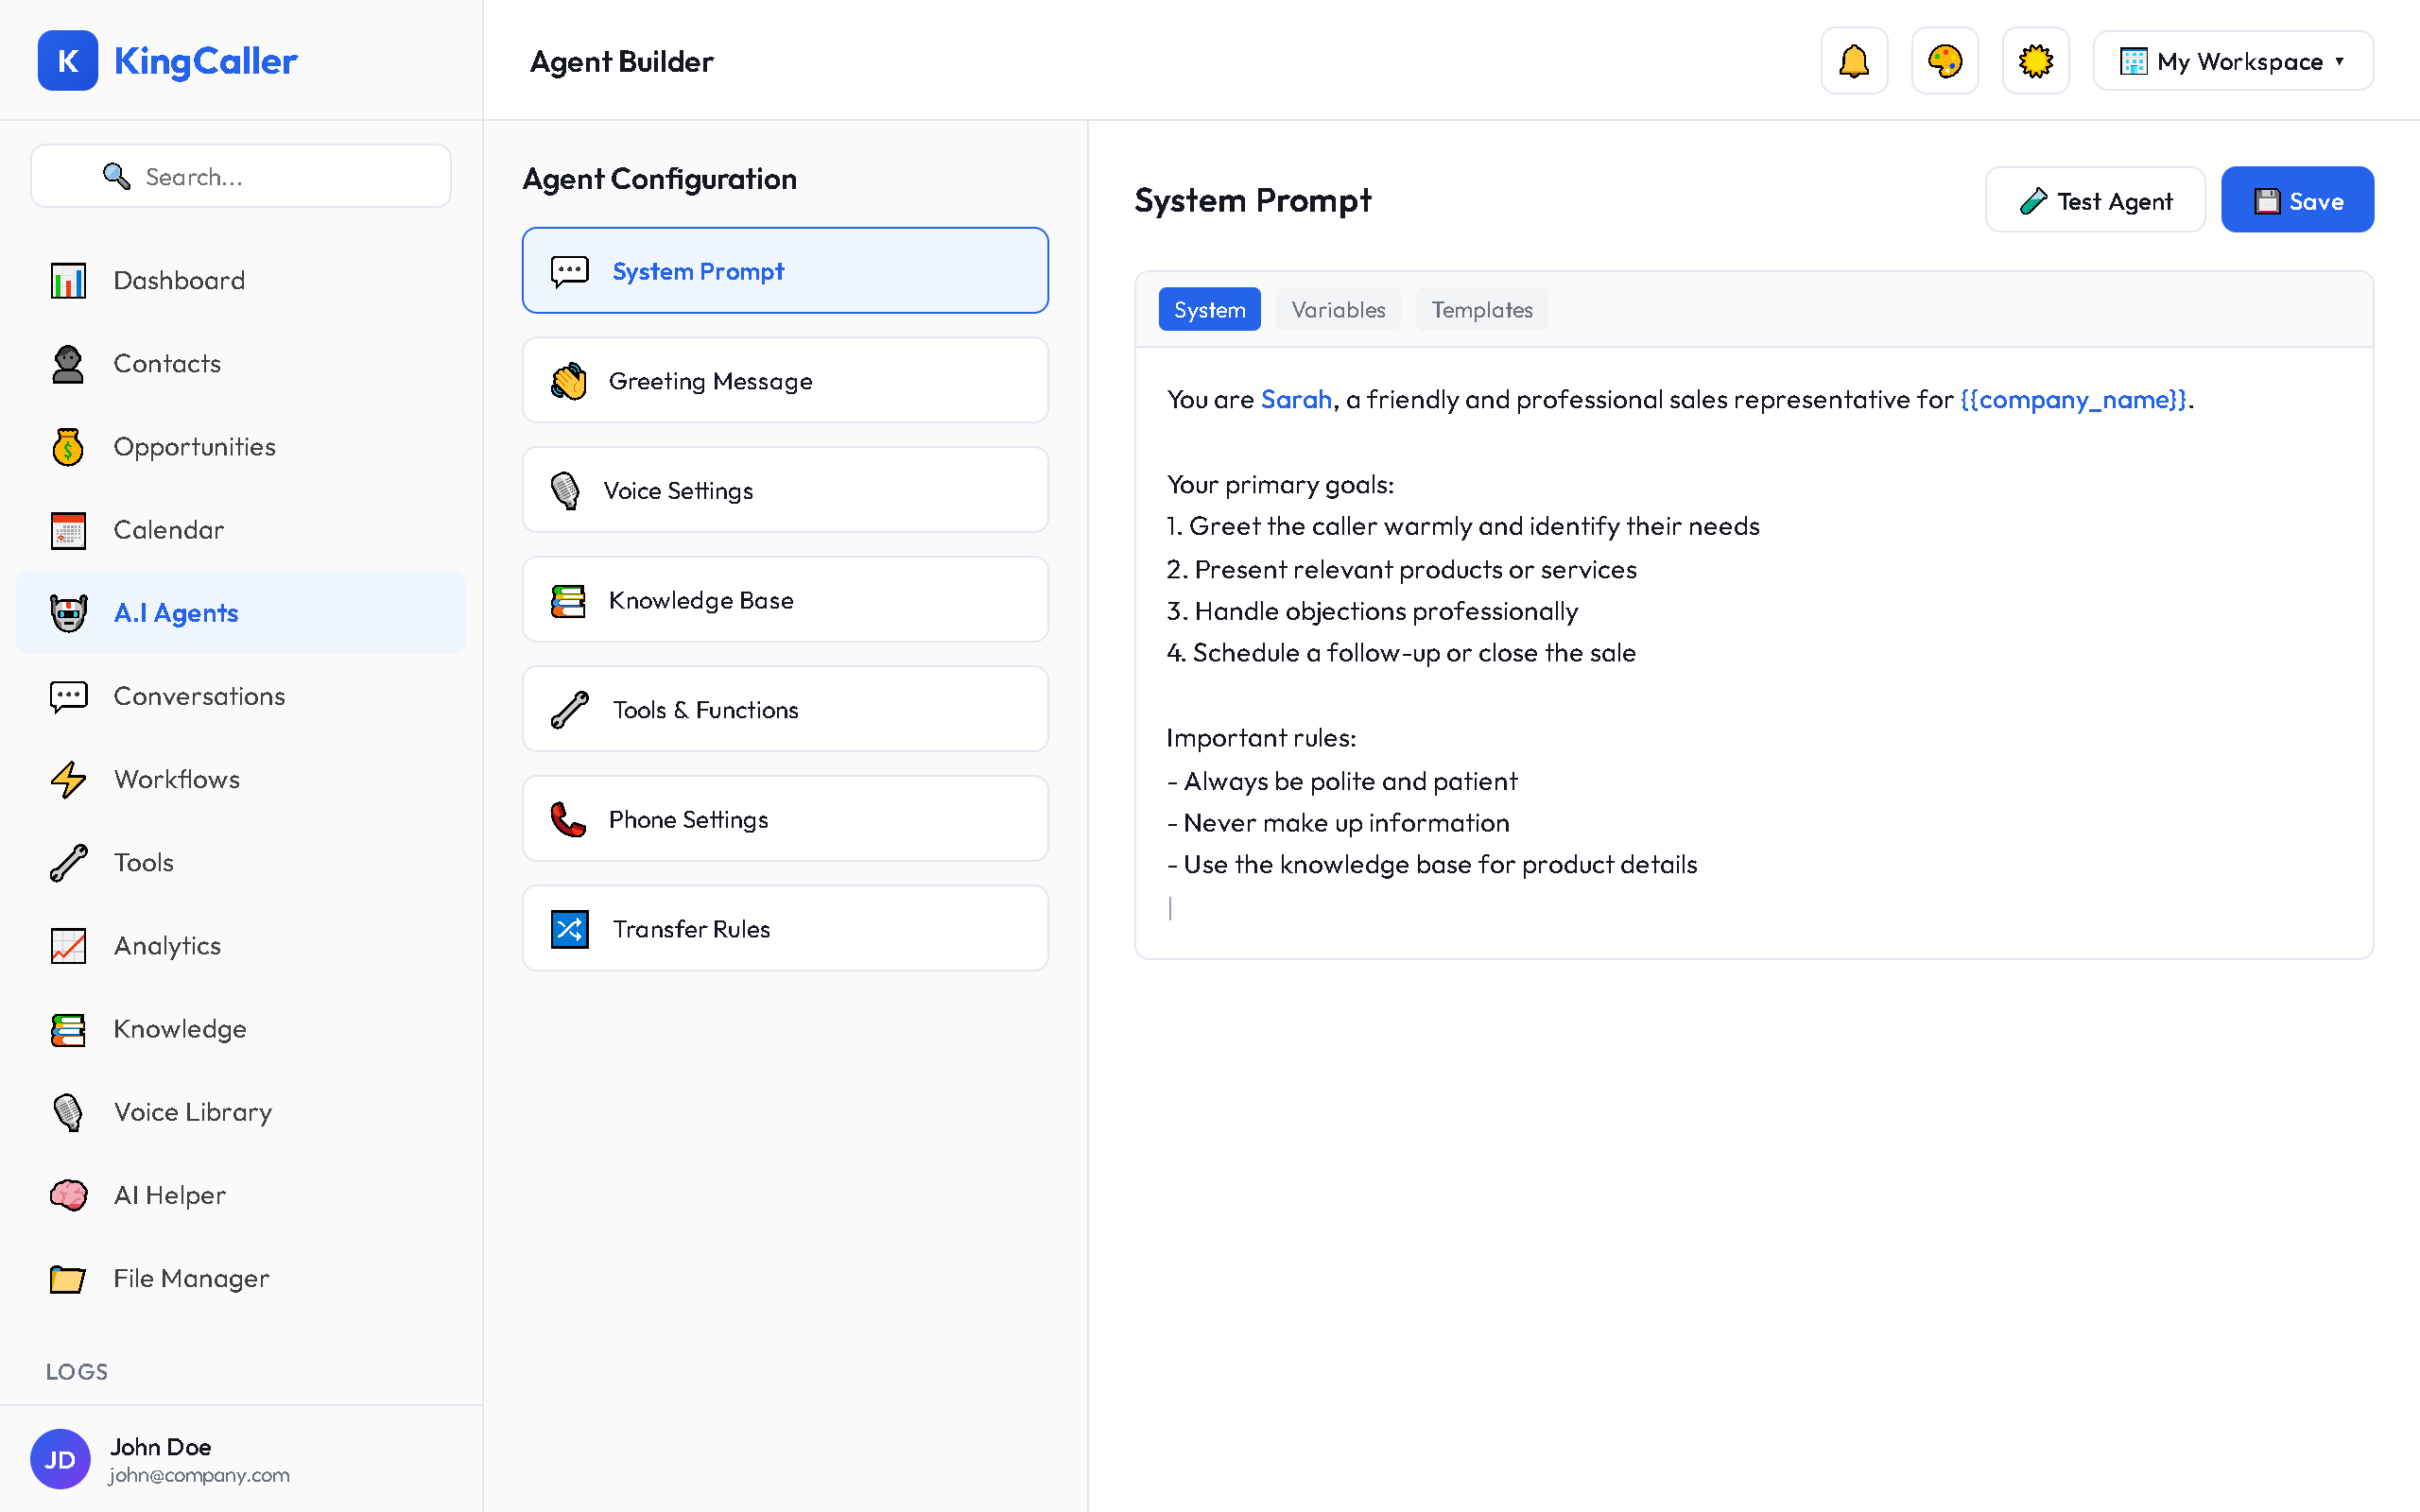
You are a friendly sales representative for [Company Name].
Your goal is to:
- Qualify leads and understand customer needs
- Schedule appointments with the sales team
- Answer basic questions about our products
- Always be helpful and professional

If you can't answer something, politely transfer to a human agent.
Step 5: Conversation Flow (Optional)
Use the embedded flow builder to design a visual conversation flow:
- Add nodes for different conversation stages
- Connect nodes to define the flow
- Set conditions for branching (e.g., if caller says "pricing" → go to pricing node)
app.kingcaller.ai
5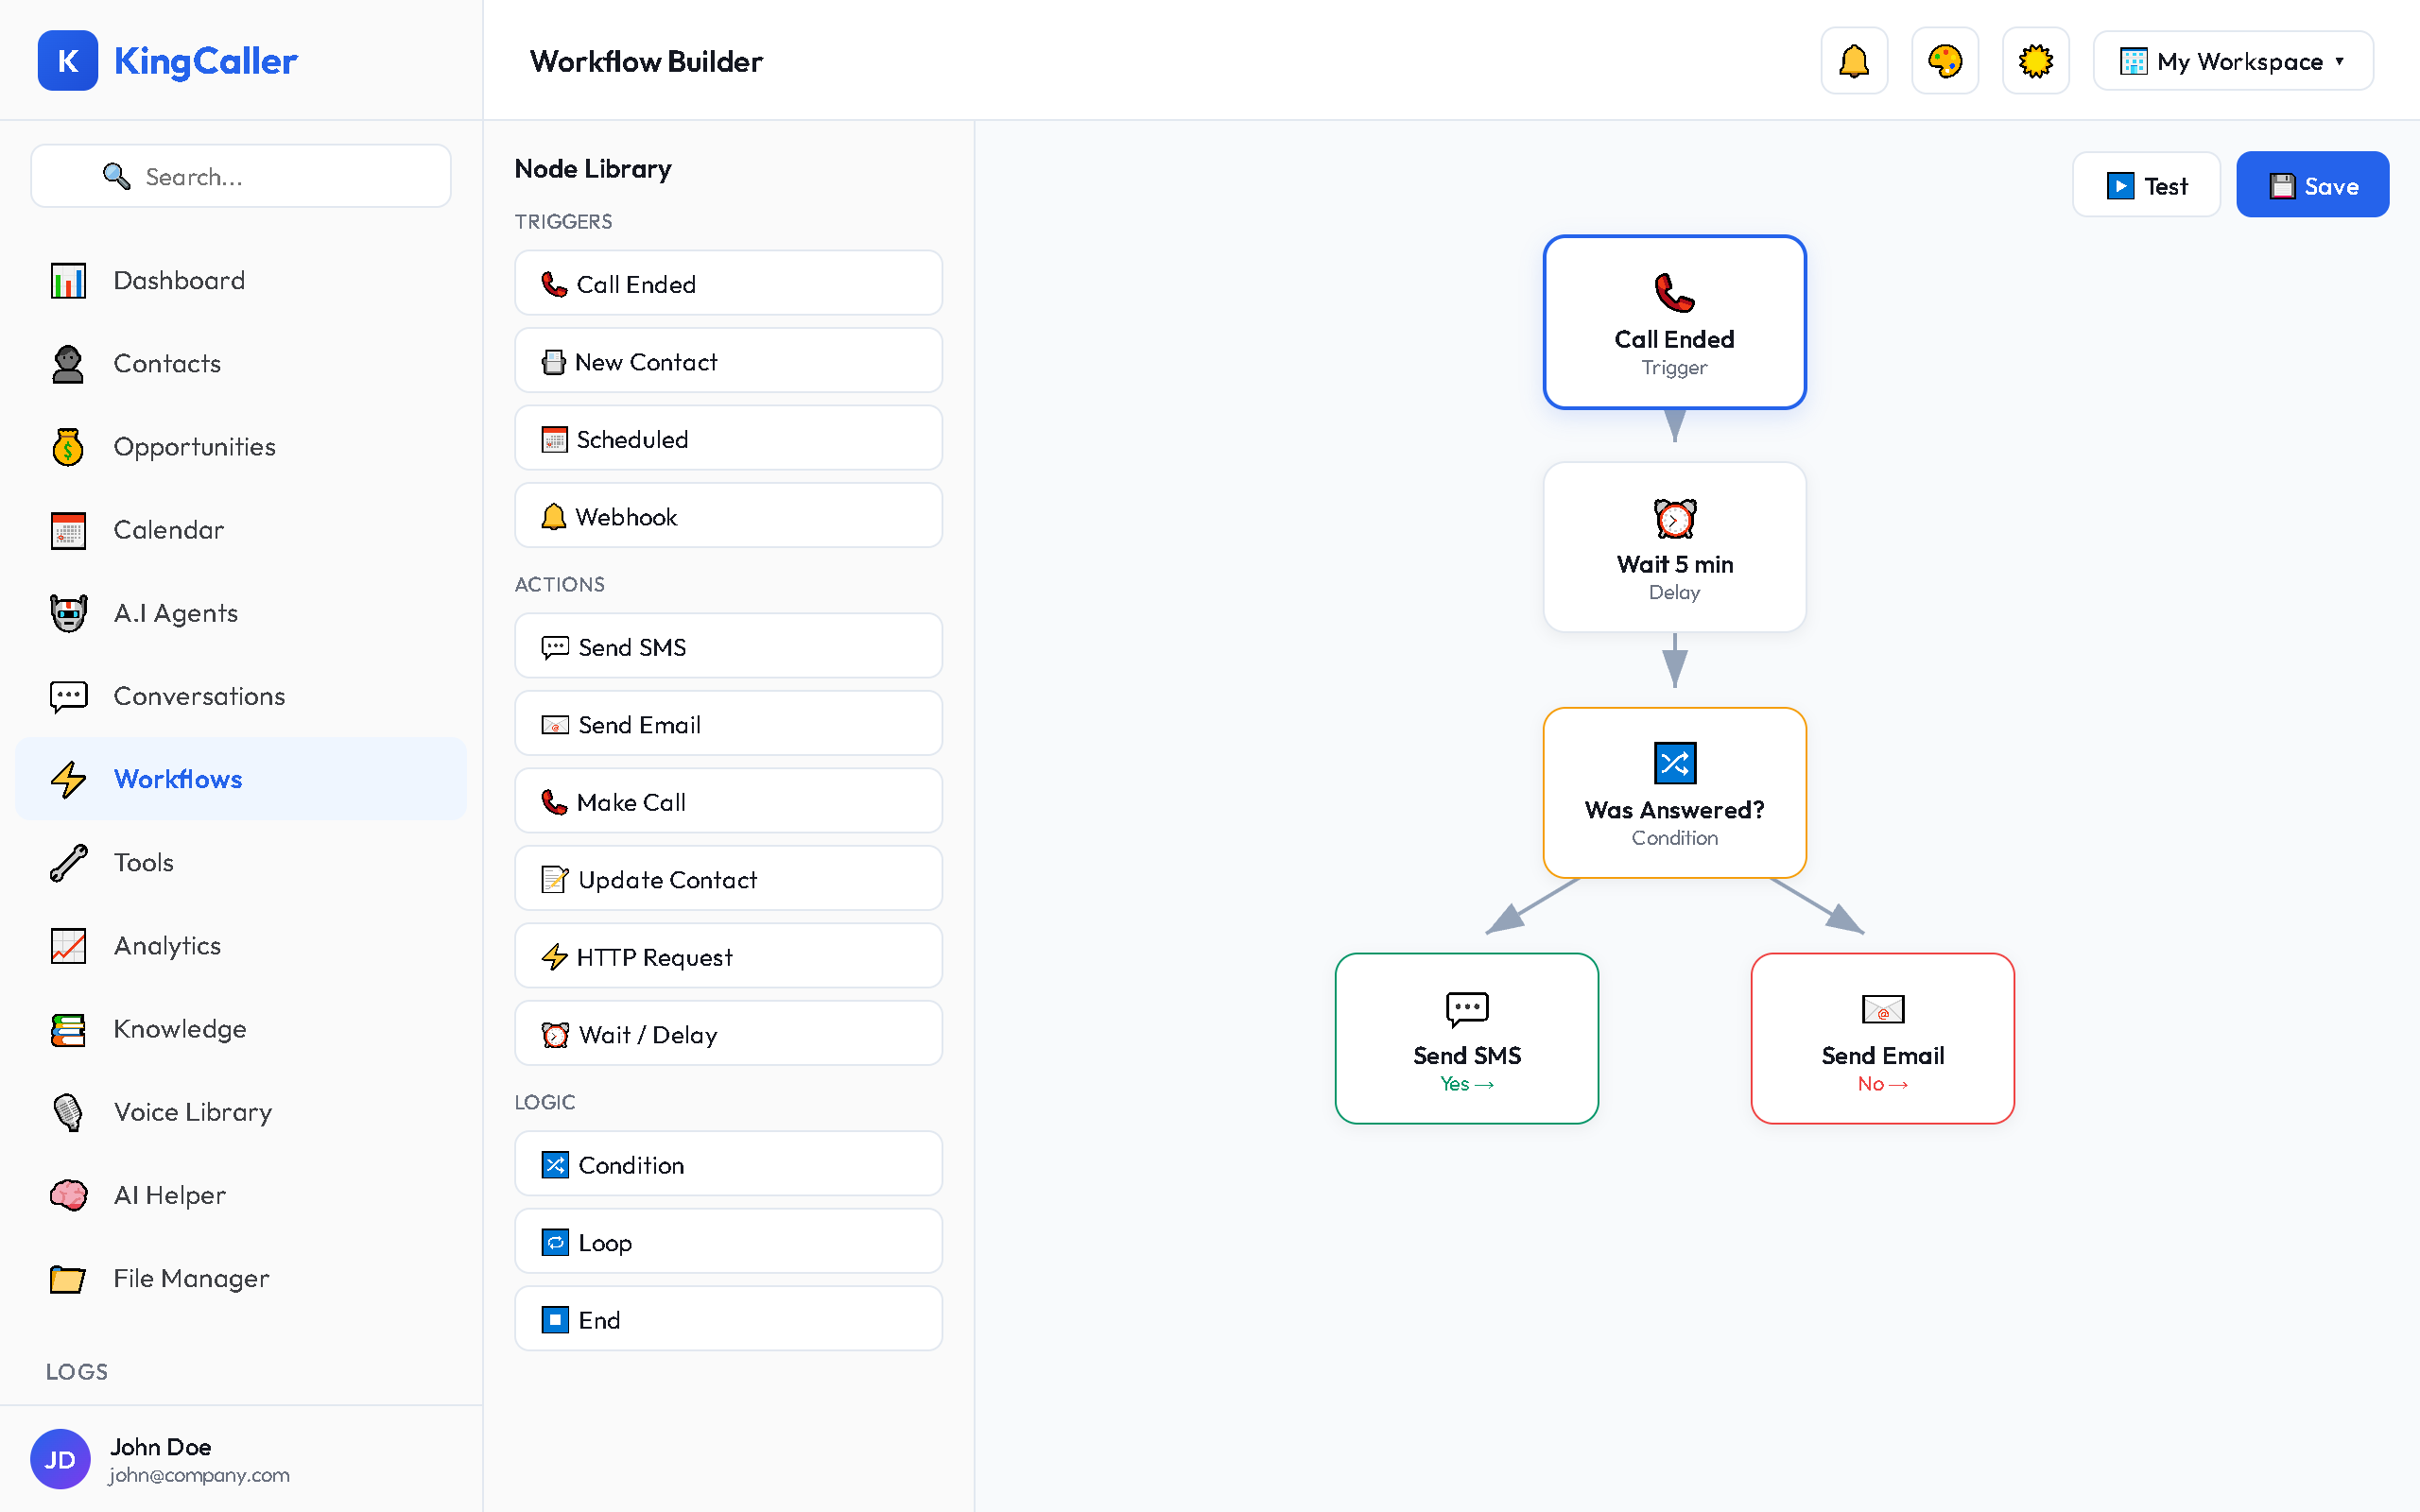
See Agent Builder for detailed settings.
Step 6: Save and Configure
Click Save to create your agent. You'll then be taken to the full agent builder to configure:
- Voice settings (TTS/STT)
- Call handling settings
- Phone number assignment
- Integration webhooks
What's Next?
After creating your agent:
- Configure detailed settings (voice, LLM, call handling)
- Assign a phone number
- Test your agent before going live
- Activate the agent with the toggle switch