Building Workflows
Create automated workflows step-by-step using the visual editor.
Building Workflows
Creating a New Workflow
- Navigate to Workflows in the sidebar
- Click + New Workflow
- Give your workflow a name and description
- The visual editor opens
The Visual Editor
The workflow editor uses a node-based canvas:
- Left panel — available triggers and actions
- Center canvas — your workflow diagram
- Right panel — settings for the selected node
app.kingcaller.ai
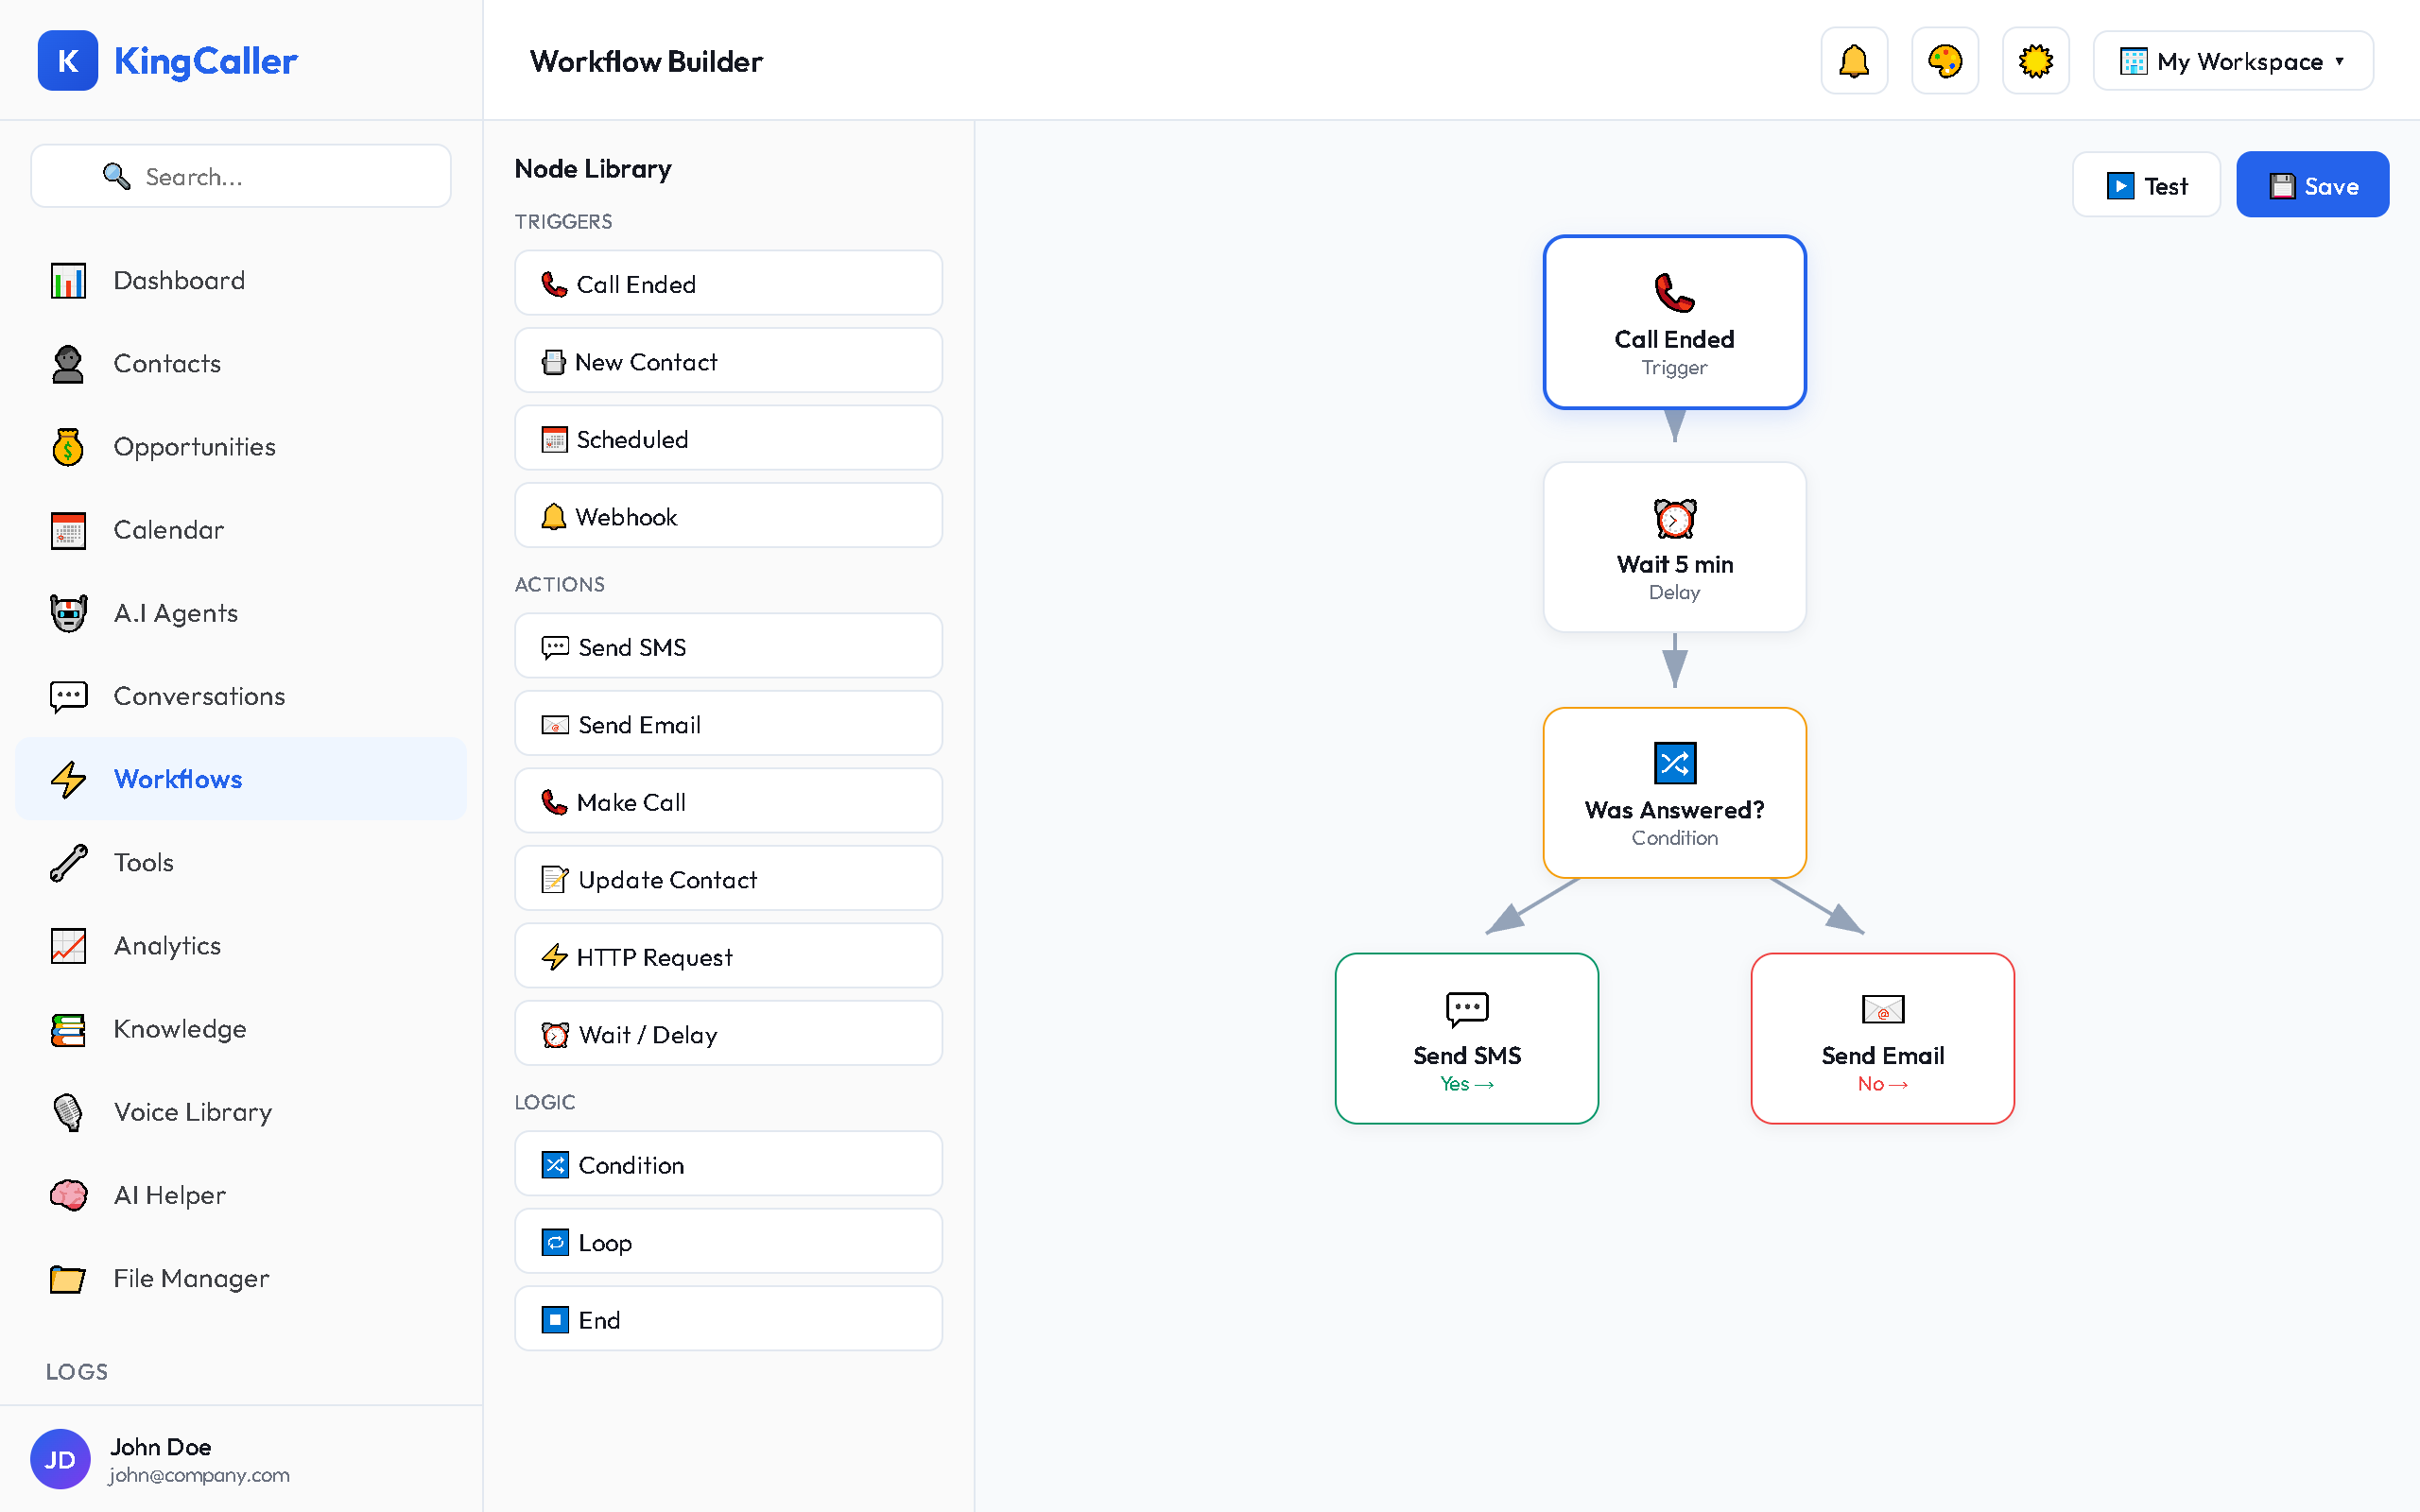
Adding Nodes
- Drag a node from the left panel onto the canvas
- Or click + on an existing node to add the next step
- Connect nodes by dragging from one output to another input
app.kingcaller.ai
1Node Types
| Node | Purpose |
|---|---|
| Trigger | Starts the workflow (always the first node) |
| Send SMS | Send a text message to a contact |
| Send Email | Send an email to a contact |
| HTTP Request | Call an external API |
| Update Contact | Modify contact fields |
| Create Task | Add a task to the pipeline |
| Delay | Wait for a duration (minutes, hours, days) |
| Condition | If/else branch based on data |
| Webhook | Receive data from external services |
Importing Workflows
Import pre-built workflows from JSON files:
- Click Import button
- Select a JSON workflow file
- The workflow loads into the editor
- Review and adjust settings
- Save and activate
Activating a Workflow
Toggle the Active switch on the workflow card to enable/disable it:
- Active (green) — workflow runs when triggered
- Inactive (gray) — workflow is paused
Workflow Logs
Monitor execution in real-time:
- Each run is logged with timestamp, status, and steps executed
- View detailed logs in the Workflow Logs section